
 Hello, time for another viwrastupr guide.
 I'm sorry, I just can't stop!
This guide's focus: Hair.
The Intuitive Approach
To start out with, many people approach hair like this, as separate individual strands:
This is the intuitive approach. After all, hair is a bunch of unique strands, right?
Nope. Not at all. Well... it is a bunch of unique strands, but in the same sense that you're a bunch of unique cells. Ah, so now you've got it eh? Your going to approach it as value and lines at the same time and save yourself some trouble right? Well, no. We don't draw all the cells and it is absolutely insane to draw the individual strands and try and get value in there at the same time.
So what is hair? How to approach it?
The Basic Approach
Hair is shape. Look at this:
No strands, none, but it still feels like hair. "But," you say, "there are still strands in that one!" EeNope. There is value and there are implied strands. Hair clumps together, it has volume and shape. Thick pieces together and planes, much like fabric.
How to approach hair, from the beginning:
- Like everything else, simplify the shape. Call it a sphere, cylinder, cone, rhombus, cube, whatever. Shade this shape without stranding anything. Here's a nice example of this:
art by Speccysy - Note the edges of your shapes, the edges of the initial highlights, the secondary shadows, all of these. Expand on these to clump things a bit. Variety is really important here. Here, you are implying strands through hair like shape. Remember the Twi picture above? Going from general to specific is important in this process. Big clumps, medium, and small. No individual strands. I will find you and take your head if you try individual strands here.
- Work in some details. Compare what you have to what you'd like to have (yes, a guide within a guide – everything intermingles!). Variety is also important here. When you make everything a strand then everything looks the same and it is quite boring and not descriptive. Some nice highlights, a few lone strands and some larger darks make this:
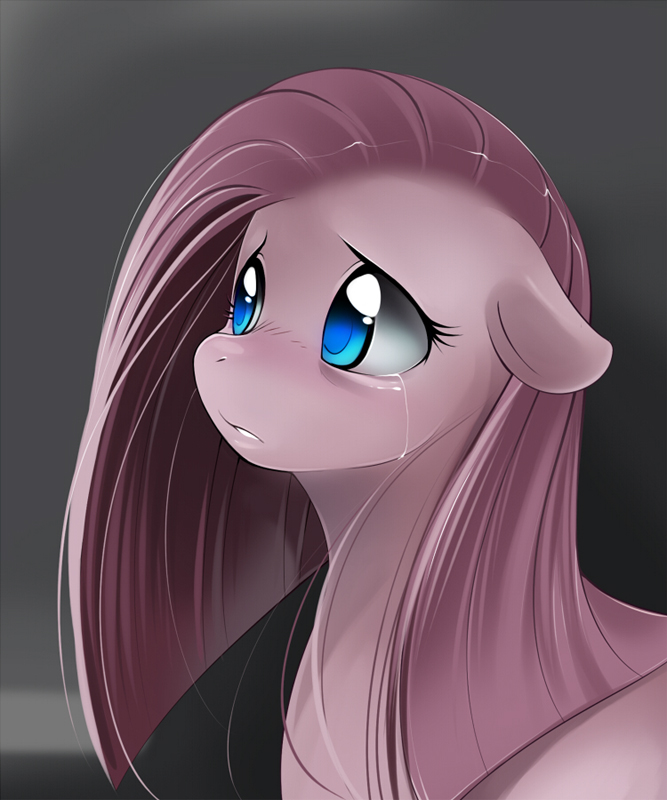
Yours, of course, can vary, but more on that in the next way.
There is another, entirely different and faster way to approach hair. Why didn't I do that first? Because it isn't as intuitive and an understanding of hair as shape/volume is needed first before this becomes successful. Do the other one first to help your understanding of hair as shape.
The Advanced Approach
Hair shapes as volume and texture: suggesting strands without giving them.
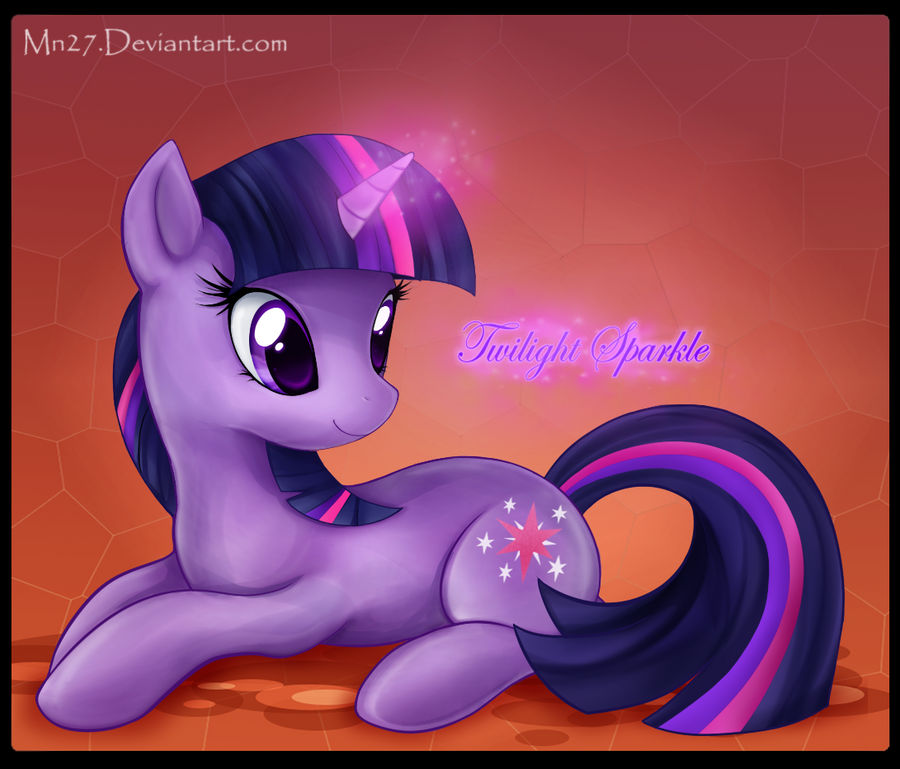
Many of you will remember this piece:
It's been on the main sub a few times and is linked in the 6th bi-weekly. The hair in it is gorgeous, but why? The answer is simple: Contrast. Darks next to lights make for something that stands out very much. But there is more to it, and that's what come from the next approach.
To make this part easier, moarvespenegas has made this handy dandy visual guide at the bottom of the page that shows the following steps.
- Sketch your hair layer. Here is most of the actual thought. you're blocking out the hair's individual shapes, such as with steps 2 and 3 above. Work from general to specific. Have both big shapes and small ones and medium and medium large and maybe a medium small, whatever strikes your fancy, but avoid noticeable patterns. Remember you are implying the shape of hair not just giving it away and stranding things. Block in your main color and move on to step 2.
- For the general shadows. Initial, secondary, tertiary shadows and shadows within shadows still apply here. Use these to separate the different shapes, going lengthwise along the hair. Why lengthwise? Because it interacts very well with step 3.
- General highlights. These are strandish in that they imply individual strands and can be more similar to each other than the hair shapes. Your placement is very important on these. Put them widthwise. You can get something like this:
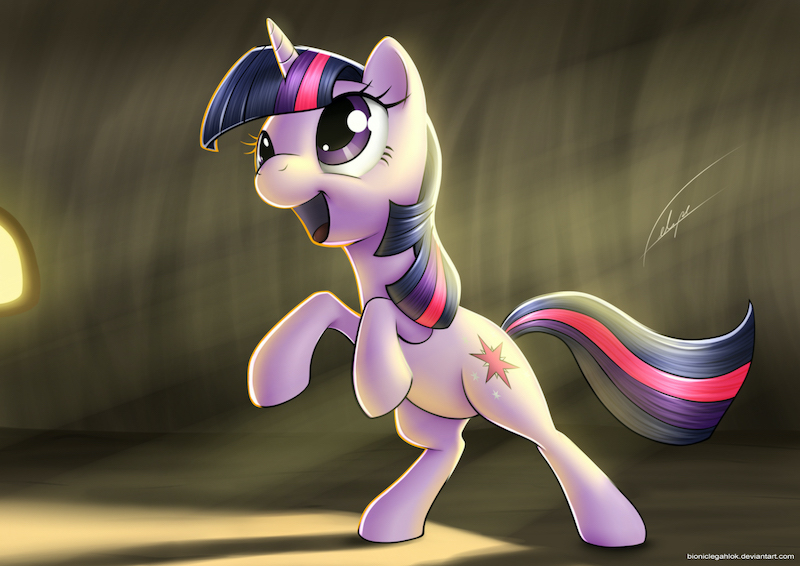
art by BionicleGahlok
But there's more to it. What more? Step 4. - After affects, lighting and shadow. Hair is individual strands, clumps and a general overall volume. We've addressed the first two here, but not the general volume. Let's take a look at the picture from the last step again. There are bigger differently colored highlights and shadows describing the general shape of the hair. Gradients are... okay here, but remember edges are really how our heads understand a description.
- Details! These are up to you. Respond to your piece. Keep in mind though that if everything is special, then nothing is special. Strands may be very pretty, but if they're everywhere or they dominate then it is a big ol' mess.
At no time are any of these steps absolute, however deviating from them without intention to or purpose can be disastrous. By all means experiment with switching the highlights and shadows. Play around with individual exceptions, like a highlight out of place or cast shadows. Respond to what you have made.
 Any problem is solvable, if you simply break it down into its individual components, but still relate those components to the whole.
 That's too long I want something shorter!
 Reality is complex.
 Not cool.
moarvespenegas's visual guide
