Hello and welcome to another Thursday weekly lesson. This one is fairly simple and straightforward. Common anatomical errors! What do we often do wrong or not think to consider when drawing ponies?
I cannot emphasize enough the importance of using references when drawing to correct your anatomy What follows are tips, not laws.
All too often artists start out with something like this:
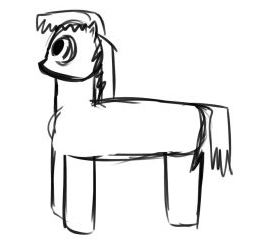
 What is that... that thing?
Alright, not quite that bad, but this has all the things that an artist thinks about ponies from the beginning. So, let's dispel these pony preconceptions one by one.
The Head Possibly the hardest part of the pony is capturing the pony's personality and we do this through the face and head.
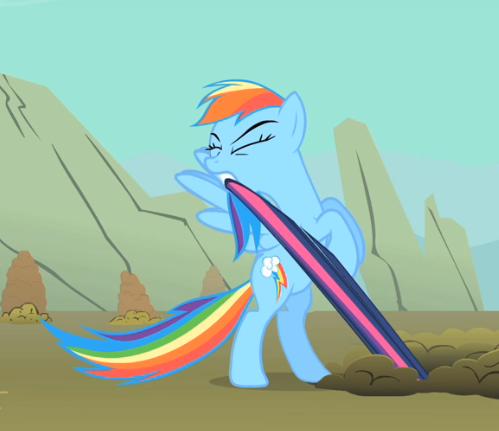
- Muzzles. Pony Muzzles are square ish from the 3/4 and side and just a small line from the front. Look closely below and you'll see this line is actually smaller than the nostrils are far apart. Crazy, huh?
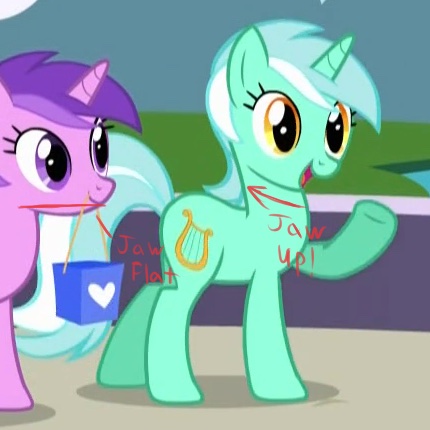
- The jawline. A pony's lower jaw seems complex but it has two simple rules. There is an overall horizontal line from mouth to end of jawline when the mouth is closed. When the mouth is open the jaw tilts up and into the back of the head. This is because the jaw is basically a hinge. Meaning the muzzle does not move, regardless of how much the mouth opens. Also keep in mind there is a mild change in direction between the jawline and the front of the muzzle for the overall curve.
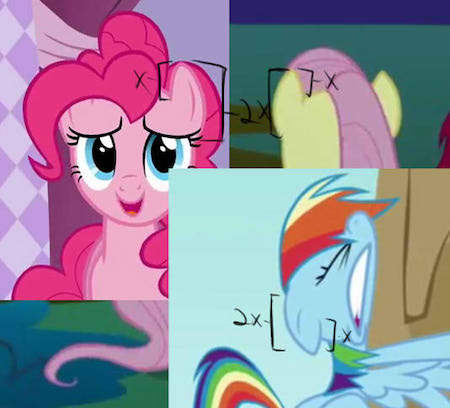
- Ears! Pony ears are huge things, taking up about half a head height in their own height. Their shape is also like that of a lemon with the lower, inner quarter cut out making the outside of the ear much longer than the inside:
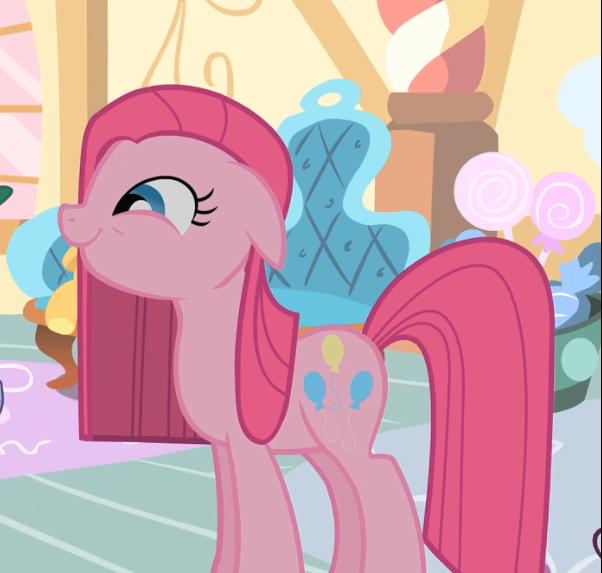
- Hair. Pony hair is big and poofy!
Note how it comes up off the body before coming back down. This is also true with tails and it keeps things from being flat. Also hair does not end in a series of the same sized spikes. Even with spiky hair: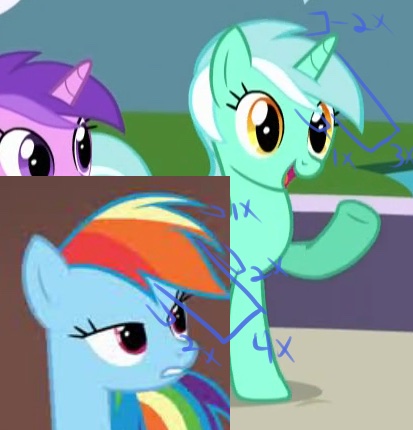
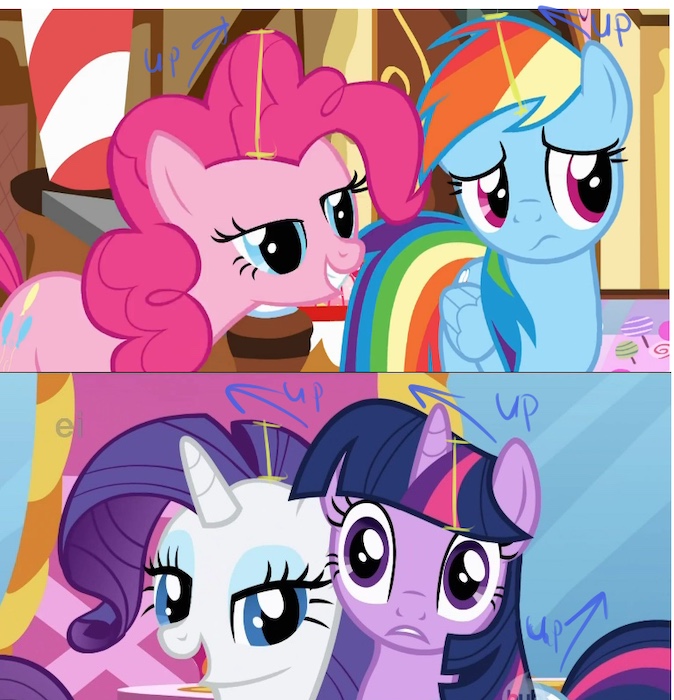
- Hair again. There is a division between the headmane and the neckmane in every pony:
This is because neckmane literally sprouts from the neck: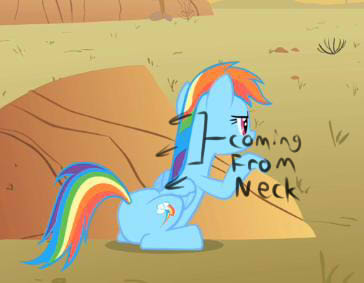
Thus, there's zero space between the neck and the neckmane.
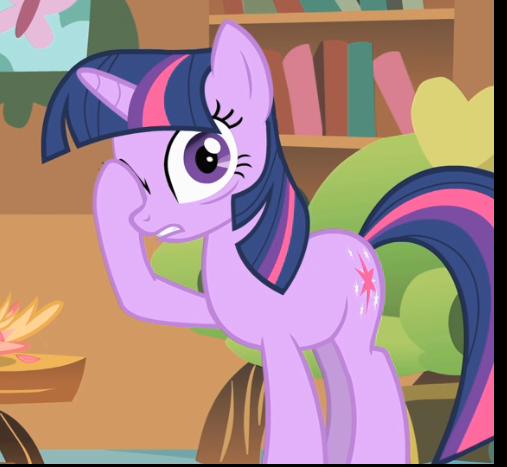
Pony eyes. Eyes deserve their own tutorial, but a few pointers:
- Eyespots! Eyespots! Eyespots!

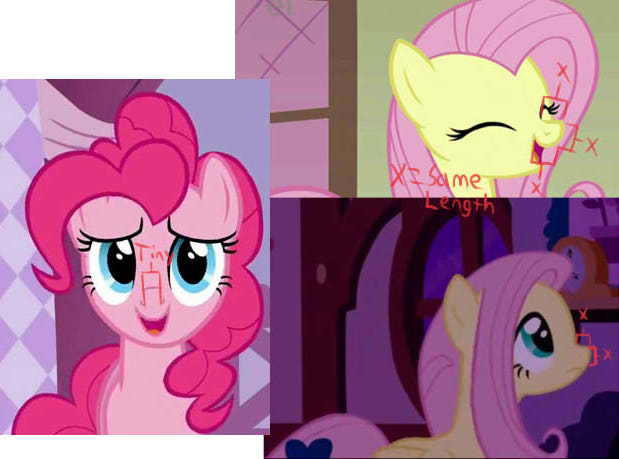
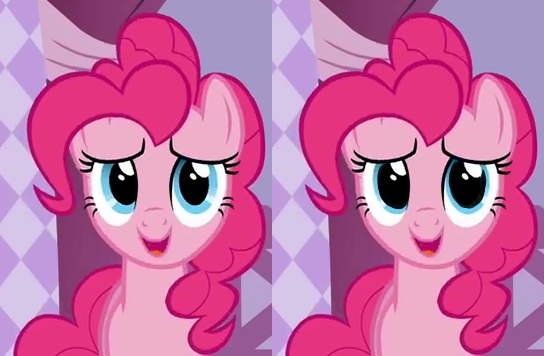
Those white little reflective spots are ridiculously important for conveying the emotions and intent of your character. - Pony eyelashes vary from pony to pony, and are generally thicker than the rest of the outlines:
This is especially important in B&W media to convey a difference between the outlines and the eyelashes/eyebrows:
- Pupils. MLP irises and pupils are quite large. However, there still needs to be some space in between the iris and pupil to make the expression not look a little catatonic:
Though this space can be manipulated for expressive reasons. Also pay attention to how much of the iris/pupil is covered by the outside of the eye – if the iris and pupil aren't touching the outside at all, your ponies can look 'unhinged'. - Shape. Pony eyes are ellipse shaped as are the pupils, eyespots and irises. They also tilt a little in 3/4 view:

Also, the inside of the eyes in 3/4 and frontwards view are almost parallel to one another:
Thus most of the curving for the eyes happens on the top and bottom, and only a little on the side.
Pony Legs
- Front legs are simple. A pair of slowly thickening curves when straight, and any number of curves when raised... not that simple, but refer to joints!
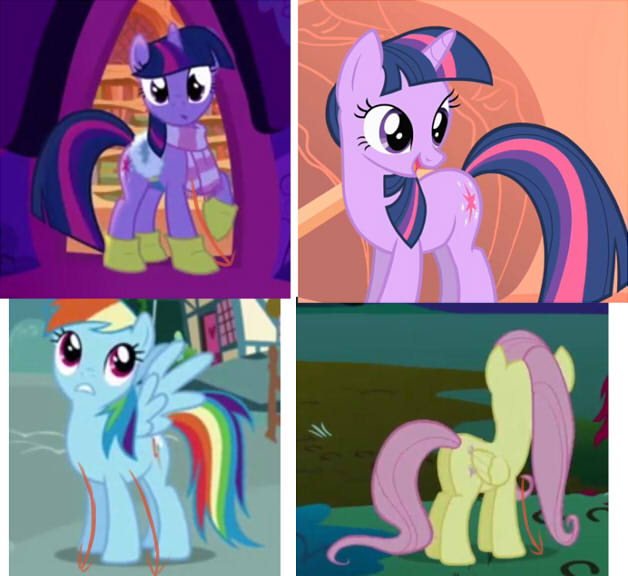
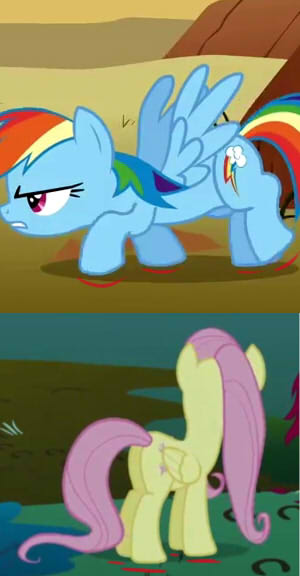
- Back legs. Back legs kick back:

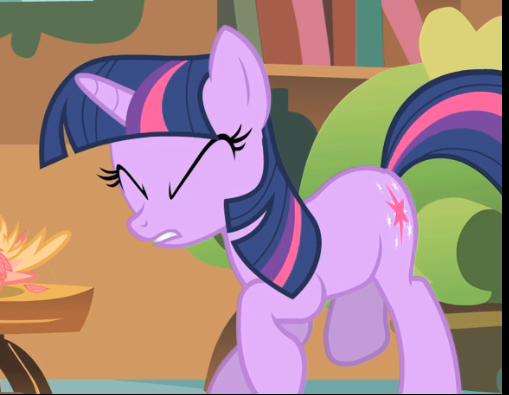
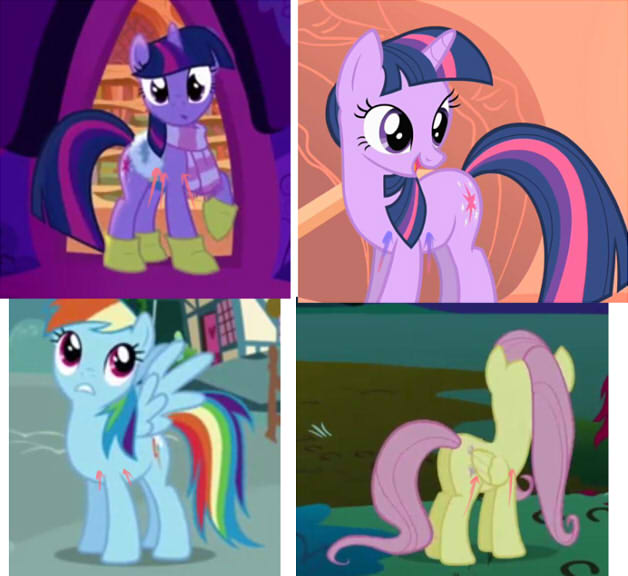
This means that the hoof is actually further back than the rump. This is even/especially true on princess ponies:
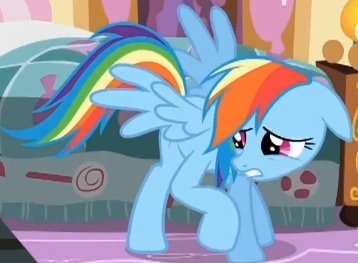
The back leg's haunch is also much thicker than the rest of the leg. The leg thins, then thickens out for the hoof:
- That little right angle thing on the back leg.
 &%@! that thing!
Knowing the bones for the back leg, we can see that it is not some magic right angle randomness, but rather the joint for two bones attachment: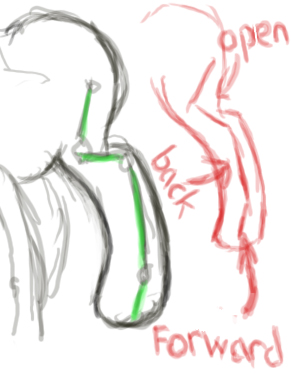
Thus, it isn't always at a right angle and interacts with the haunch and rest of the leg. - Joints. Pony legs move all over the place. But they have specific joints:

Understanding how these joints move is essential to drawing ponies, especially when moving. Fortunately you always have references for that. - Overlap! It's important. The legs come in the body a ways before tapering out:
This legs us know where they are in space and prevents things from looking flat. - Stiffness. A throwback to joints pony legs are never straight, even when standing still:

These curves keep things interesting and dynamic. - Hooves. MLP hooves curve more when not flat footed and there is also a tiny hoof joint at the end which helps with some overall curves:
- Legs in general. MLP legs are thick. Look at how little space there usually is between the legs:

This is because the legs (at least in show style) take up a lot of space. They're thick things, as opposed to real ponies' legs which are thin.
Pony Bodies
- Size... MLP bodies are tiny! Tiny tiny little things that are actually less wide than the legs are tall:
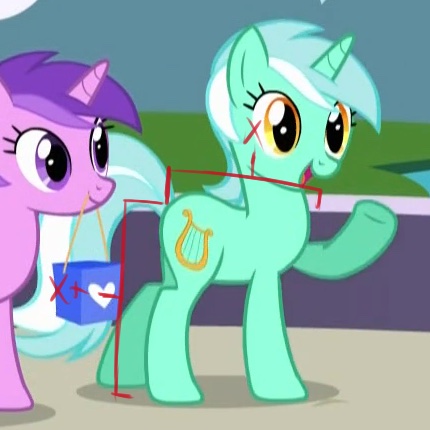
They are made up of two intersecting circles – a smaller one for the chest and a larger one for the rump: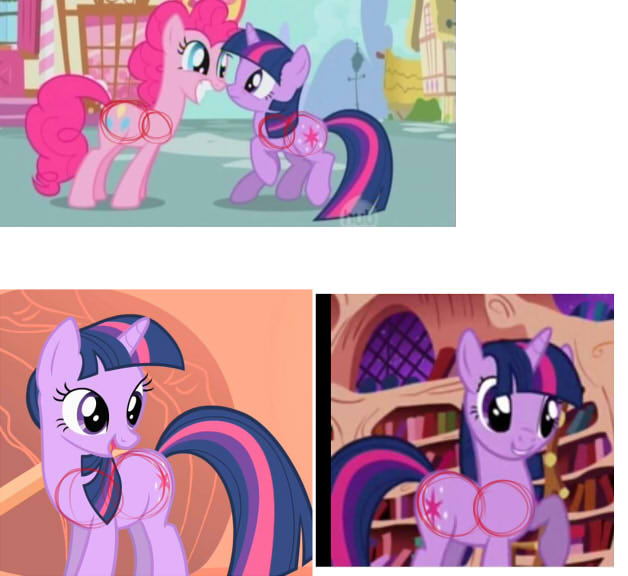
- Spine curves. The chest is actually lower than the rump in show style:

This is because the spine curves out, then in, and finally out again:
- Neck. MLP necks are just thinner than their bodies and fairly short:
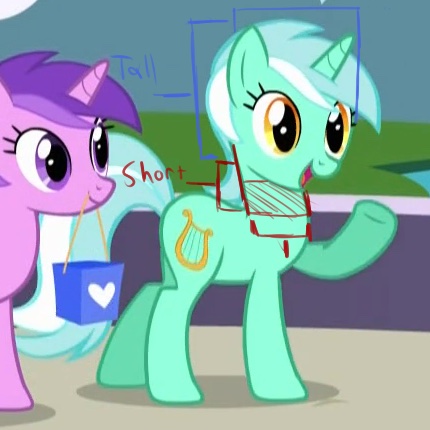
Something that is mindblowing on the neck is how close, vertically, the rump and jawline are to touching:
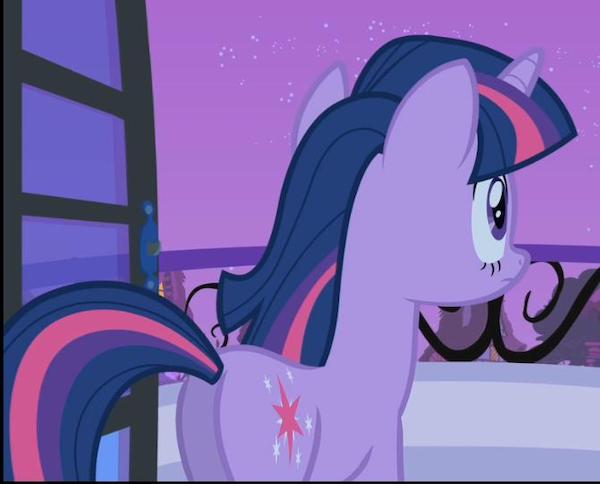
…though there are times when the neck is quite springy:
 Look at how many screenshots are being referenced here. They make the best studies!
 - Chests. A pony's chest doesn't jut out that far and has to connect to the body. This means there's a general roundness from the neck to the chest to the body that should be consistent:

- Rumps.
 Pony butt.
They are round. They come from the spines outward curve and keep curving much like a circle. They then have the tiniest curve out as they become the thigh: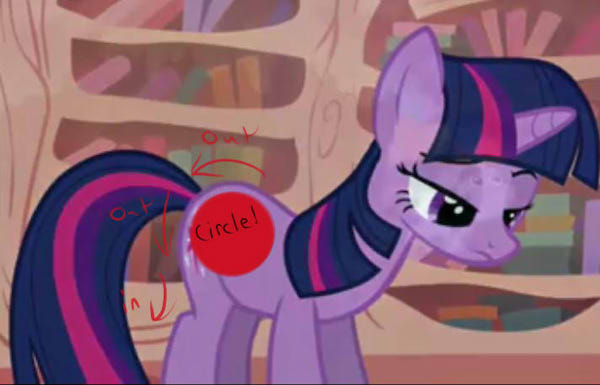
- Wings! Pony wings are complex little things, but here's a visual breakdown:

When folded they usually cover a bit of the Cutie Mark. From the front ,they're still kinda visible. They also tilt up a little when folded on the side. There is also a Gap in the top of the wing where it attaches on the side. The inside feathers come all the way to the beginning of the outside feathers. The outside of the wing curves inward first then outwards. - To make wings. Mark the ends of the feathers and their length first and then make the individual feathers.
If any part of the pony body is troubling you, do a study of it (meaning copy, but don't trace) it from references at different angles and situations over and over and over. Slowly ease off the references but keep the quality. Also, to take the most of your references, measure and compare.
This includes how to:
To get angles, proportions and scale right from a reference use a pencil to compare angles between a reference picture and your piece. Hold the pencil up to the reference to get the angle, then back to your work. If you do this while working, you'll notice that it becomes a lot easier to correct mistakes that 'just don't look quite right.' This takes a lot of the guesswork out and makes proportions and angles much easier.
Do this everywhere. The angle from the ear tip to the rump. From eye to muzzle. From front to back leg. Between any two arbitrary points or to get the angle and/or placement of a limb or eye or tail. Absolutely positively everywhere. And then erase. Mark, erase, correct and repeat. Don't get bogged down by working too long in one area. Get an almost right foundation and move on. Corrections and refinement come with the process.
There has been some confusion on this, so let me expand. When I say angle I don't mean relative to horizontal. Draw your line. Hold the pencil up parallel to that same line, invisible or not, that you are measuring on your reference. Bring the pencil over to your piece without changing its angle. Compare what the pencil is to what you have. Correct with said pencil. Repeat.
Eventually you will be able to sight compare, but you'll always have that pencil/pen to help you out!
Questions, concerns, comments and feedback welcome! This guide is up to being appended so if I missed anything or there's something you'd like more information on or there's some other common pony error you see, bring it on.