Welcome to this first lesson! These are meant to teach y'all the fundamentals of art.
Whether you're already experienced or just starting out, the fundamentals never lose their importance. We'll have a couple of activities down below, so keep your pencil or tablet handy.
The Undersketch
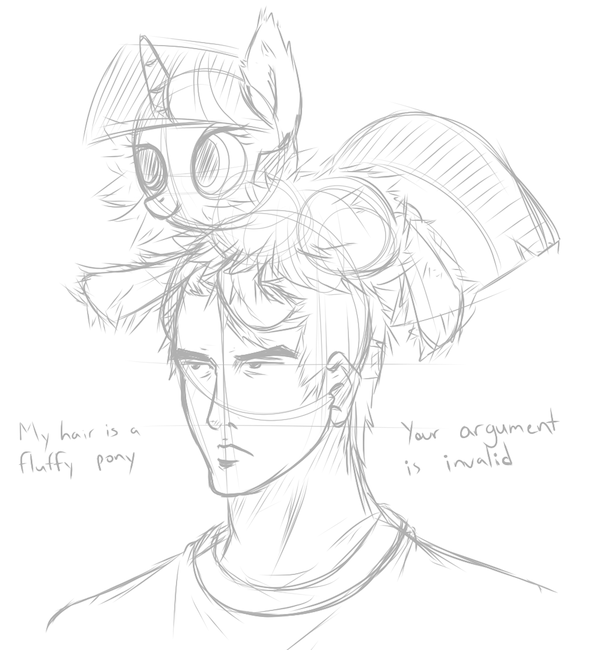
When starting art, we usually begin with an under-sketch. It is an essential part of the planning stage of your art piece. This is where you put down lots and lots of lines and try things. You should erase freely and indiscriminately. Look at this nice sketch:

It's not immensely detailed, but the magic of a sketch is that it's a fantastic way to quickly test things out before you commit to any single idea.
At this stage, you can afford to change things at a moments notice, so use this to your advantage! As a beginner, you might think that your sketch lines are permanent. Once a line is laid down, you shouldn't change it. Nope. That's stinkin thinkin. Like the tides and the seasons, no line is permanent, and you should not hesitate to change things if they look wrong.
Swooshy Lines
 That isn't even a word!
In its essence, sketches are flowy, loose things. How you make them flow is by letting your lines flow as well. Use quick, long swooshy strokes rather than short scratchy ones. I feel this a very important part of sketching.
For example, this sketch with lots of loose, swooshy lines:
Lots of beginners use short lines for sketching, and it's a bad habit to keep. Whether your strokes are quick and decisive, or swishy and flowy, or short and timid, it will reflect in your work:
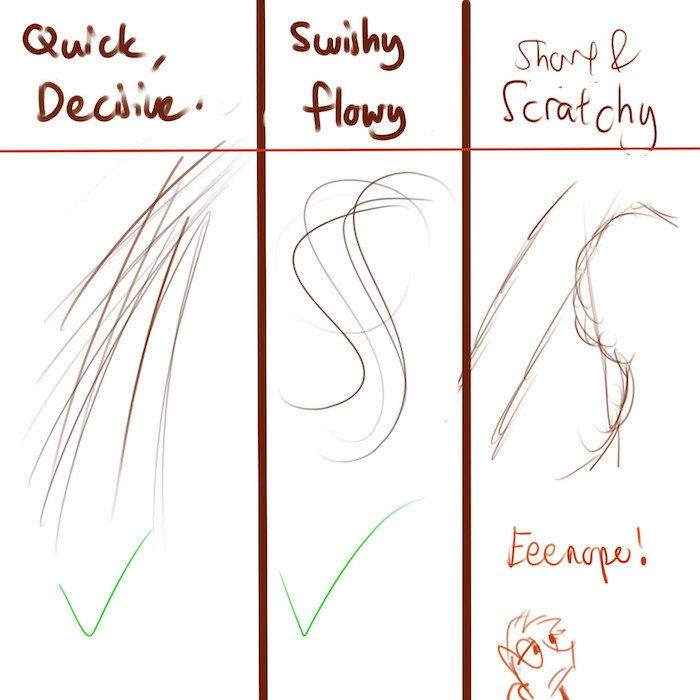
Also, use BIG strokes! Don't sketch a teeny pony like the doodles people leave on the top of their exam papers. You've got an entire sheet of paper to doodle on. GO BIG.
Activity Time!
Nuff talk. Lets have a short break here and practice how to actually make swooshy, flowy stuff. Alrighty. Grab a pencil or your tablet, and lets practice drawing shapes.
Now, I want you to draw BIG circles. Make as many as you can, and as big as you can (don't just draw one big one and call it a day). Vary their size. Overlap them. Neatness is not important. The idea here is to get you used to the idea of flow.
If you've got a sketchbook or a nice piece of A4 paper, fill dat page up. For digital users open up a file and make a big canvas (around 3000x1500 pixels will do), and have it fill your entire screen. Fill it up.
What you'll want to do is use your shoulder to draw those circles. Sound scary? It's really not. Think of it as a 'wax on, wax off' motion. What do you mean you've never seen Karate Kid? Get to drawing, you.
You should end up with something like this:

Remember: breathe deep, breathe out. Wax on, wax off.
Had fun? Carrying on -
General to Specific
With sketches, we want to get the general impression of what the final piece will look like. So, it is good procedure to go from big general lines to specific, precise lines. With general lines, you should be thinking 'This leg kinda goes here, but i'll be able to change this if it looks weird. This hair roughly should flow this way.'
The idea behind this is to get your idea down on paper quick. People tend to be afraid of a blank canvas. Its so full of potential, but full of potential failure as well, and that is understandably intimidating. When you make marks on that white space, it's a lot less intimidating. You get a better idea of what the final piece will be as you put down more lines. This takes a lot of the fear out of starting to draw. General lines example ☨^2
When you've got the general lines down you can move on to more specific lines. 'This leg should be right here. This mess of lines is an ear.' Specific lines example Keep in mind that this is still not your finished product. If something looks wrong, keep refining things! Even more specific by Cooley
Messiness
Be messy! How messy you'll want to be is up to you, though. Don't be shy. Sketches are meant to be imperfect things. No one will judge you. If you're judging yourself, stop it, you. Remember that the idea is merely your idea fleshed out on paper, and not your final piece. Look at how messy Lauren (Faust)'s sketches were.
But hey, some people don't even use undersketches!
Ah, but we do sometimes see artists pull nice clean lines out of nowhere without no under-sketch in sight. Somehow 5 minutes later they have a pony. What's up with that? Why do I need one then?
The problem with this is that these lines don't come magically to them. They are able to draw these because they've done them a thousand times before. Going straight to clean linework without an under-sketch and no prior experience is bad plan. If things look out of place, you will have to draw that line again and again, repeating ad infinitum until you get it right. It's not the greatest of workflows. Not good for sanity either, nope.
While we're on the topic of experience, i'd like to bring up the fact that even experienced artists make under-sketches. I'm absolutely not making this 'under-sketch' thing up! Let's take a break from the text-wall and take a look at how our friendly neighbourhood Egophilliac sketches.
Video:
Notice how she uses those ginormous loose lines to plan out her picture, before going into specific precise ones. Note her willingness to change things quickly as she sees fit. Something looks wrong? Erase it. Redraw it. Move things. No big deal.
If you want to see more sketch videos, links are in the supporting comment.
TLDR; The essence of sketching
- The sketch is not your final product. Nothing is permanent. Make mistakes. Change. Adapt.
- The sketch is a quick way to get your idea down on paper. Big, general shapes. Refine later!
- Allow yourself to be messy.
- Long swooshy lines. With short scratchy lines your picture loses flow.
Pony sketching
'Okay I get it', you say, 'bring on the ponies', you say.
I'd go deeper into this sketching ponies topic, but i'm sure its been covered extensively by many more experienced brony artists before me, so I will be brief. For more detailed guides, look at the footnote comment.☨Anatomy
Shapes are what ponies are made of.
The basis of any pony is three circles. Where your ears, legs, hair, tail, and eyes will be positioned will be based off of these circles. The magic of these circles is that you can move them around along with your legs, and you will have different poses. Witchcraft, really.
Along with these circles, it's important to understand the underlying skeleton in ponies. They are what determine how the joints move and at what points they move. I know that the show breaks these bone rules a LOT, but to keep them looking from sloppy jelly, bones are important.
Even as I say this, it is important that you do not rely too much on these circles for poses. Being flexible is a good skill to have when arting, and guiding yourself along circles and shapes is quite the opposite of flexible. Its good to start off with, but move on after you've got a good grasp of pony anatomy.
Activity Time
I'd like you to sketch out a pony. Use guide circles, or if you're confident enough, don't. Its up to you.
Now, i'd like to say that there is no one right way to sketch. People have different sketching styles, and that's perfectly fine. Look at how stupjam sketches look like and compare them to Sunshine's discord sketches. The two are in different stages of completion, however the difference is that Stup uses primarily long flowy lines while sunshine uses quick, bold strokes.
Hence, my only conditions for the sketches are that you: Use swooshy lines. Are willing to change things up, and adapt as necessary. Go from general lines to specific ones. Allow yourself to be messy.
What I don't want you to do is make your sketch overtly clean. Refinement comes later. If its messy, leave it messy. Cleanliness is not what I intend to teach at this present time. When you're done, post your stuff down below in the comments. Don't worry if it looks good or not. We're all here to learn, so it really doesn't matter who's better or worse.
Thumbnail sketches
The sketch has a smaller cousin called the thumbnail sketch.The thumbnail sketch, like its name implies, is in essence a sketch, only its the teeny tiniest thing. What you'll use it for is to quickly get ideas out. You use it not as a replacement for a sketch, but for planning prior to your sketch. Art is a very adaptive process, its all about trying things out and seeing what works best. The faster and easier this process is, the better. Example It also really helps with planning composition. What's composition? Well, that's something i'll cover at a later date. (Or you could google it, ya bum.)☨Composition
End Note
Right! That should cover the things I want to teach for today. So leave your stuff down below and i'll see if me or some other people from the sub can help you out with anything you have problems with and such. Don't be afraid to ask questions. Quetions like: How do I set my opacity in program 'X'? Where can I find more sketching videos? Will I ever find true love?
What didja think of the lesson? I'd like to know what you think.
Oh, and if you have sketches/sketch videos from artists you enjoy, feel free to post a link in the comments.
Thanks, and have fun.
Next week's lesson
This lesson post is the first of hopefully many lesson posts on the sub. Should all go well, next week's lesson will move onto the next step: Linework. The good clean stuff.
The week after
The week after that, I would like to teach you guys about a very important skill to have, that is drawing things as you see them. This can be from references (and even real life), how to go about doing gestures, and I will go a little more in depth into pony anatomy.
Further reading
☨Anatomy Pony anatomy and undersketching
For a more visual guide to anatomy, go to this link: Pose building in action
For bone references: Vertev's pony anatomy reference
☨Composition I jest. I don't want to offend any redditors who are bums by night.
Extra sketch videos for reference
Saurabhinator's speedsketch/paint
League of Legends art assets: Excellent use of quick thumbnail sketching and painting to flesh out ideas and concepts.
Some Example Sketches
Footnotes
☨2 There is some method to this madness. Sometimes people work in lots of detail into individual parts in sketches, while everything else is left undone. Is bad practice. When drawing a piece it's important to note that everything is drawn in relation to everything else. 'That leg needs to be yay big in comparison to the other, or Twi will look like she's tilting sideways.' Nothing is solitary in a picture. If you approach each individual body part separately, things will look weird.
☨3 Traditional artists: Given that sketches are basically messy throwaway napkins, light pencil strokes during the sketch phase help to keep your final product (when you dish out the pens/darker pencils) looking cleaner. A lighter grade pencil will help lots with this. For digital artists, this is equivalent to setting your opacity/density lower. I personally like to keep it at around 75.
Extra footnote
The sketch is not the only thing you can use to flesh out ideas. In digital painting, some people enjoy starting off a piece with large brushes because of how easy it is to define shape with it. That's a perfectly fine thing to do. I can't go too deeply into this because it's not something I fully understand. I hesitate to give out information that I can't back up without a reasonable experience and understanding of the subject.